Custom Dynamic Form using Jetpack Compose: Making Form Creation Easy!
Table of contents
Introduction
One of the most time-consuming tasks in app development is creating forms. It can be frustrating to spend hours designing and coding a form, only to discover that it’s not intuitive or user-friendly. Furthermore, forms often require complex logic to handle user input, such as conditional fields or validation rules. All of this can add to a lot of wasted time and effort.
Fortunately, there is a solution — custom dynamic forms. Custom Dynamic forms are a type of user interface that can change based on user input or other factors. They allow users to enter data by filling out fields on a form, but unlike static forms, they can adapt to the user’s needs. This means that if a user selects a particular option, additional fields or options can appear on the form to gather more information.
Step 1 — Setup the Project
First, open Android Studio and create a new Empty compose Activity

I would like to use the atomic design principle for my folder structure, here is how my project looks like

Step 2 — Define Form Field
Next, let’s define the form fields that we want to display in our dynamic form. For this example, we’ll create a simple FormField data class that holds a label and a type:
enum class FormType{
  TEXT,
  EMAIL,
  PASSWORD
}

data class FormField(var label:String, var type:FormType, var value:String="")
Here we can see that the FormField data type is quite simple, containing only a label, type, and value. We use the FormType enumeration to define the type of input for each form field later on.
Step 3 — Create Input Component
then create input component, named TextInput it supports label and input type
@Composable
fun TextInput(
    value: String,
    onValueChange: (String) -> Unit,
    modifier: Modifier = Modifier,
    label: String,
    inputType: KeyboardType = KeyboardType.Text
) {
    val isTypePassword = inputType == KeyboardType.Password;

    val visualTransformation = if (isTypePassword) {
        PasswordVisualTransformation()
    } else {
        VisualTransformation.None
    }
    // use outlinedtextfield as textinput
    OutlinedTextField(
        visualTransformation = visualTransformation,
        keyboardOptions = KeyboardOptions(keyboardType = inputType),
        value = value,
        onValueChange = onValueChange,
        modifier = modifier.fillMaxWidth(),
        label = {
            Text(text = label)
        })
}
here is how the preview looks like

easy to use just need to call it like this
TextInput(
    value = "Name",
    onValueChange = {},
    label = "Name",
)
Step 4 — Create Form Component
Now that we’ve defined our form fields, let’s create a DynamicForm the component that displays the form fields and allows the user to input data. Here's an example of what the DynamicForm the component might look like this:
@Composable
fun DynamicForm(
    formFields: List<FormField>,
    onFormSubmit: (Map<String, String>) -> Unit,
    modifier: Modifier = Modifier
) {
    val formState = remember { mutableStateMapOf<String, String>() }
    Column(modifier = modifier) {
        formFields.forEach { formField ->

            val inputType = when (formField.type) {
                FormType.TEXT -> KeyboardType.Text
                FormType.EMAIL -> KeyboardType.Email
                FormType.PASSWORD -> KeyboardType.Password
            }

            TextInput(
                value = formState[formField.label] ?: formField.value,
                onValueChange = { formState[formField.label] = it },
                label = formField.label,
                inputType = inputType
            )
        }
    }
}
we can use it anywhere just need a list of FormField, here I use the empty state to save temporary data from DynamicForm
then to use it so easily just like this
@Composable
fun MainScreen(name: String) {
    val formFields = listOf<FormField>(
        FormField(label="Name", value = "Name", type = FormType.TEXT),
        FormField(label="Email", value = "Email", type = FormType.EMAIL),
        FormField(label="Password", value = "Password", type = FormType.PASSWORD)
    )
    Column(modifier = Modifier.padding(20.dp)) {
        DynamicForm(formFields = formFields, onFormSubmit = {})
    }

}
Step 5 — Handle Form Submission
The last step, to handle submission is quite easy, after set states in DynamicForm then send it by trigger button
Button(text = "Submit", onClick = { onFormSubmit(formState.toMap()) })this is the final DynamicForm
@Composable
fun DynamicForm(
    formFields: List<FormField>,
    onFormSubmit: (Map<String, String>) -> Unit,
    modifier: Modifier = Modifier
) {
    val formState = remember { mutableStateMapOf<String, String>() }
    Column(modifier = modifier) {
        formFields.forEach { formField ->

            val inputType = when (formField.type) {
                FormType.TEXT -> KeyboardType.Text
                FormType.EMAIL -> KeyboardType.Email
                FormType.PASSWORD -> KeyboardType.Password
            }

            TextInput(
                value = formState[formField.label] ?: formField.value,
                onValueChange = { formState[formField.label] = it },
                label = formField.label,
                inputType = inputType
            )
        }
    }
    Button(text = "Submit", onClick = { onFormSubmit(formState.toMap()) })
}
and then this is the final MainScreen
@Composable
fun MainScreen() {
    val formFields = listOf<FormField>(
        FormField(label="Name", value = "Name", type = FormType.TEXT),
        FormField(label="Email", value = "Email", type = FormType.EMAIL),
        FormField(label="Password", value = "Password", type = FormType.PASSWORD)
    )
    Column(modifier = Modifier.padding(20.dp)) {
        DynamicForm(formFields = formFields, onFormSubmit = {
            Log.e(TAG, "Data Form: $it", )
        })
    }

}
and This is The Final Preview
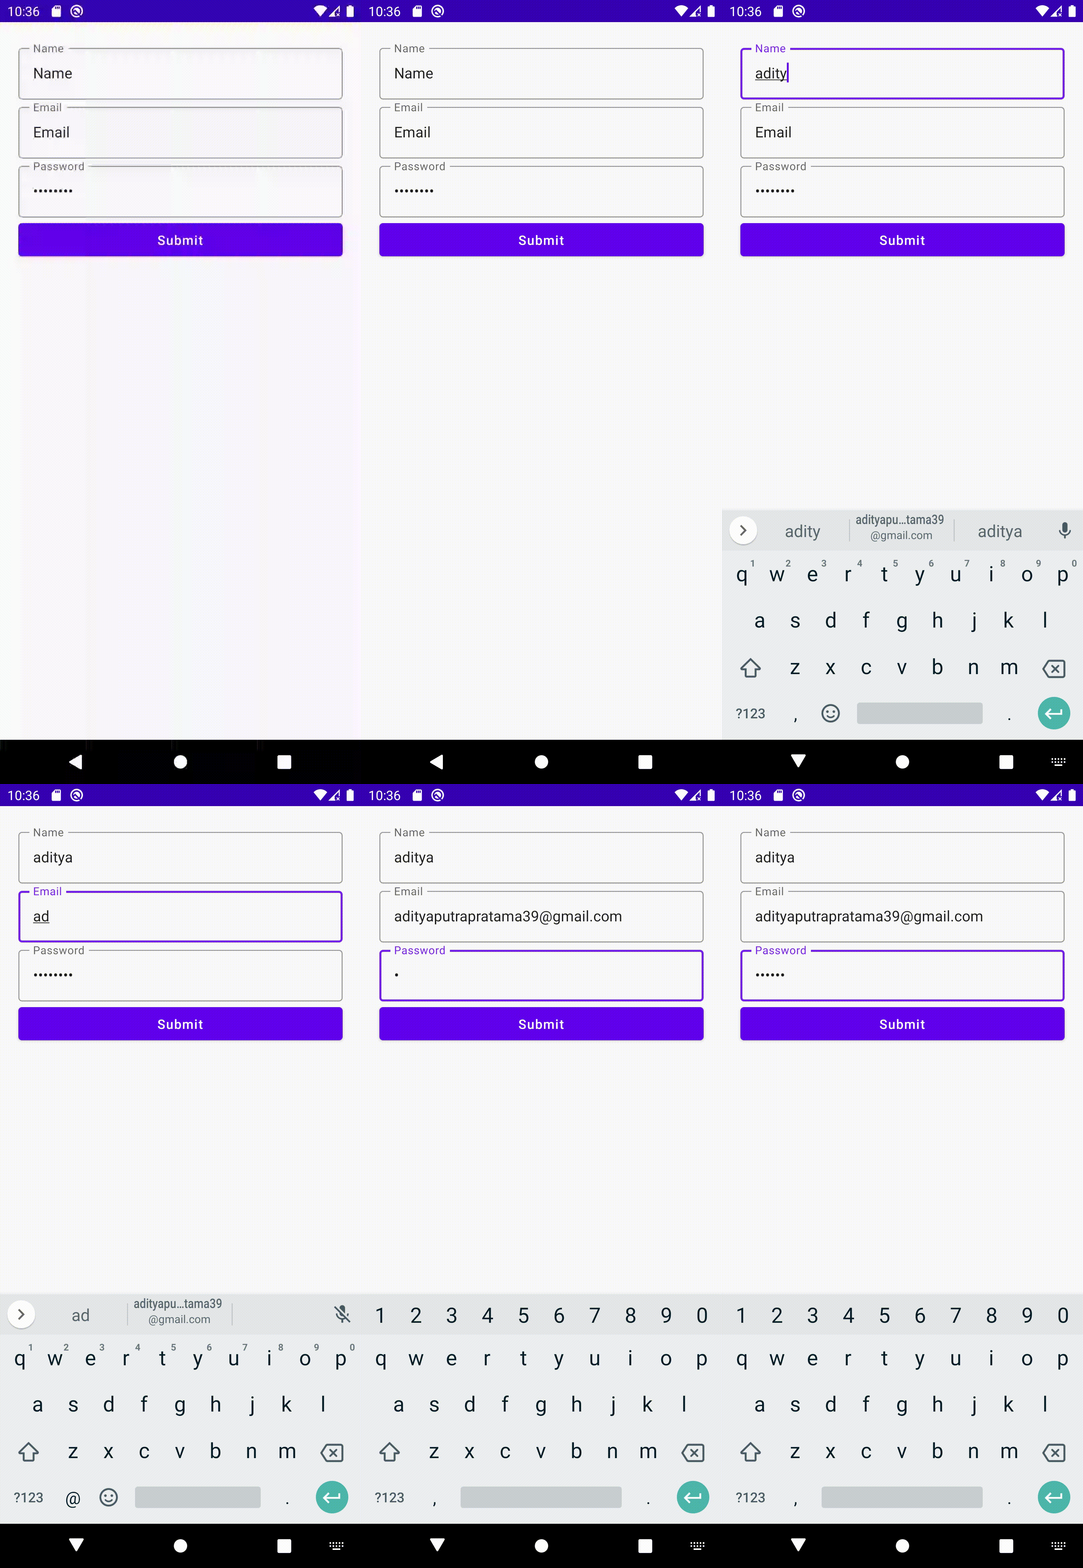
if we log we could see data form like this
{Name=aditya, Password=123445, Email=adityaputrapratama39@gmail.com}Conclusion
In this article, we’ve shown how to create a dynamic form in Jetpack Compose using custom input components and a DynamicForm component. By following these steps, we can easily create a flexible and customizable form for our app. The tutorial provides a simple example, but we can customize it further by adding more components such as Radio Button Picker, or any other components. Moreover, we can make the form more advanced by showing it from server data. To do this, we can convert JSON into a list of FormField objects.
here is a quote of the day
Education is the passport to the future, for tomorrow belongs to those who prepare for it today — Malcolm X

